You want your Christmas tree to pop, not just exist. Red is the classic holiday power move—bold, festive, and totally photogenic. But there’s a difference between “cute” and “wow, who styled this, Martha?” Let’s push your tree into wow territory with five red-centric ideas that feel polished, personal, and a little bit extra (in the best way).
1. Velvet Reds That Look Luxe (Without the Designer Price Tag)
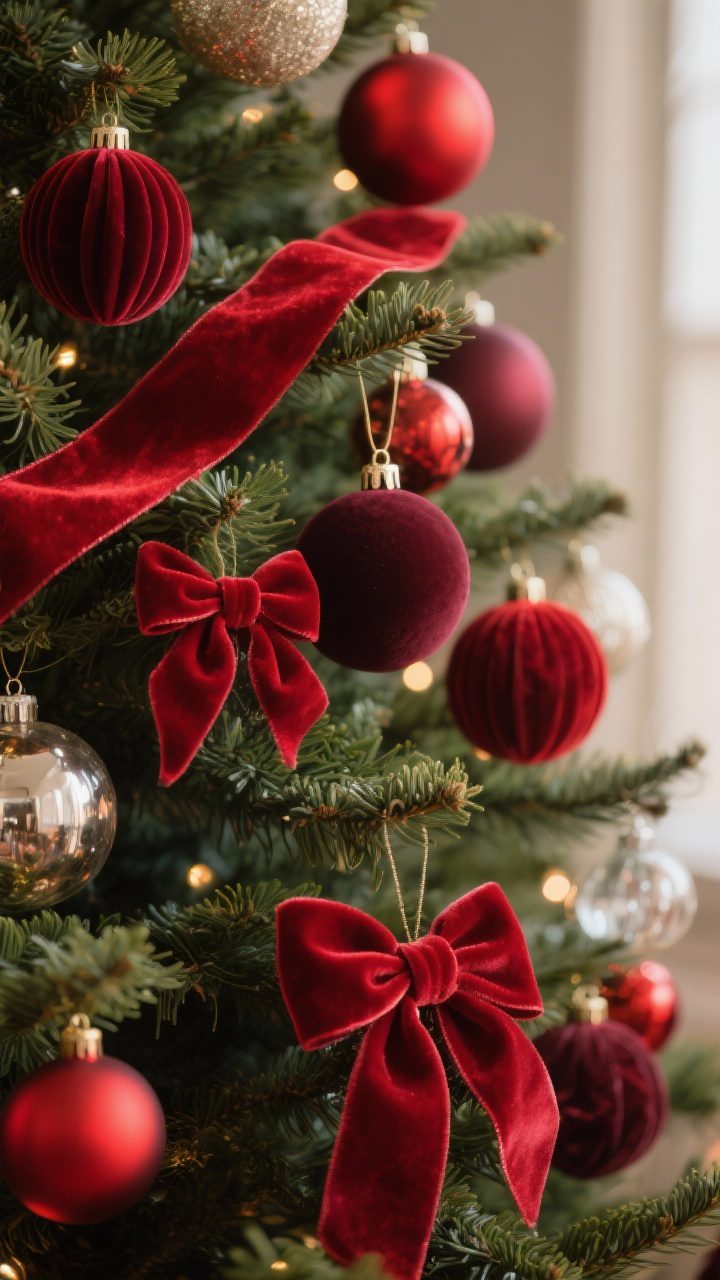
Velvet is the cheat code for instant luxury. It catches the light, feels cozy, and basically whispers, “Yes, this tree has standards.” Swap a chunk of your shiny ornaments for **velvet red** ones—think spheres, bows, and even ribbon garlands.
Why Velvet Works
- Texture contrast: Velvet against glass, metal, or matte ornaments adds depth—your tree stops looking flat.
- Warmth factor: Deep red velvet reads expensive, even if it wasn’t.
- Soft glow: Velvet diffuses light, so your tree looks cozy instead of blinding.
How to Style It
- Odd-number clusters: Hang velvet ornaments in clusters of three or five for balance.
- Ribbon garlands: Weave a 2–3 inch wide red velvet ribbon from top to bottom in loose S-curves. Tuck rather than wrap.
- Mix tones: Layer **burgundy**, **cranberry**, and **cherry red** so it doesn’t skew flat.
Pro tip: If your tree is faux and on the cool side (blue-green needles), go with richer burgundy velvet. Warmer, natural trees love brighter holly reds.
2. Shiny Meets Matte: The Red Ornament Power Couple
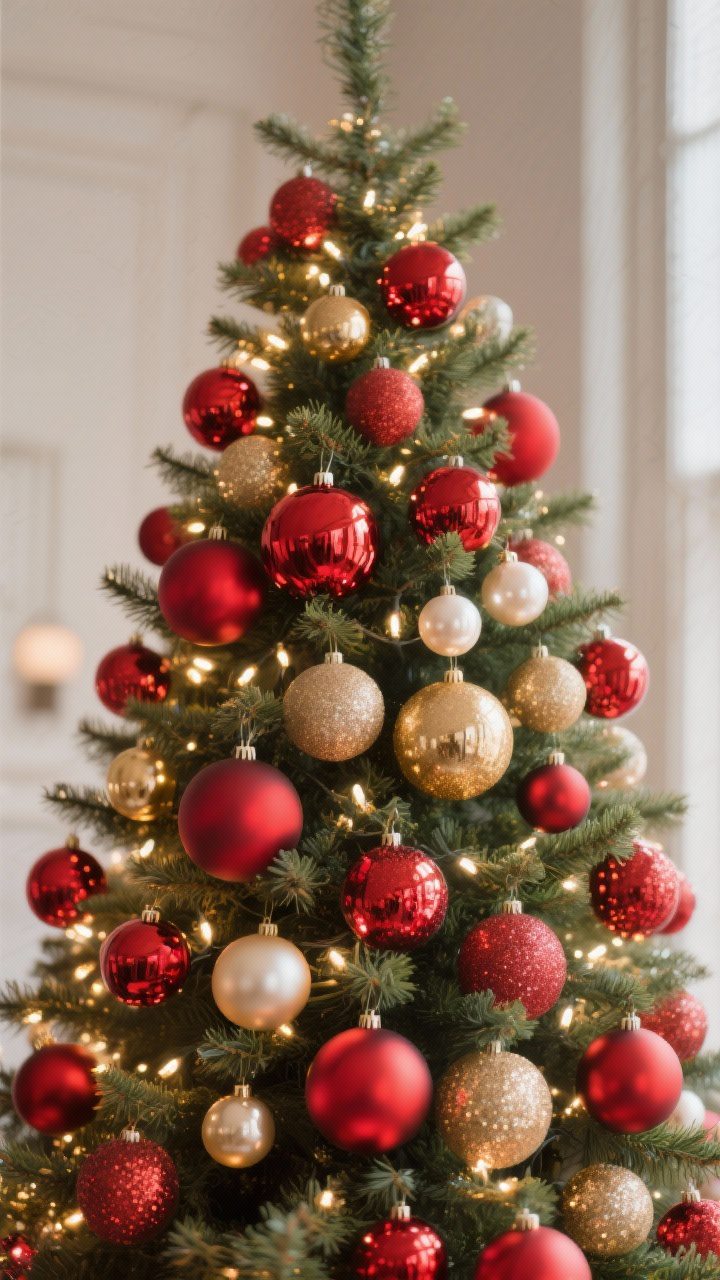
All shiny? Too glittery. All matte? Too dull. The trick is mixing finishes—**high-gloss, satin, matte, and glitter**—so red feels dimensional and intentional. This is where your tree starts to look styled, not store-bought.
The Finish Formula
- 40% matte: These anchor the palette and play well with lights.
- 30% satin/pearl: Soft sheen keeps things elegant.
- 20% high-gloss: Pops of shine for that mirror-ball moment.
- 10% glitter: Just enough sparkle to feel festive, not Vegas.
Make It Pop
- Vary sizes: Combine 2-inch, 3-inch, and one or two oversized 5-inch ornaments. Bigger pieces toward the middle add depth.
- Color companions: Pair red with metallics—**brushed gold** for warmth or **champagne** for subtle glow. Silver reads crisp and modern.
- Layer placement: Matte ornaments inside the branches; shiny ones on the outer tips to catch light. It’s like contouring for your tree.
FYI: If your lights are cool white, lean into cranberry and ruby reds. Warm white lights love tomato and holly reds.
3. Classic Candy-Cane Stripes, Upgraded
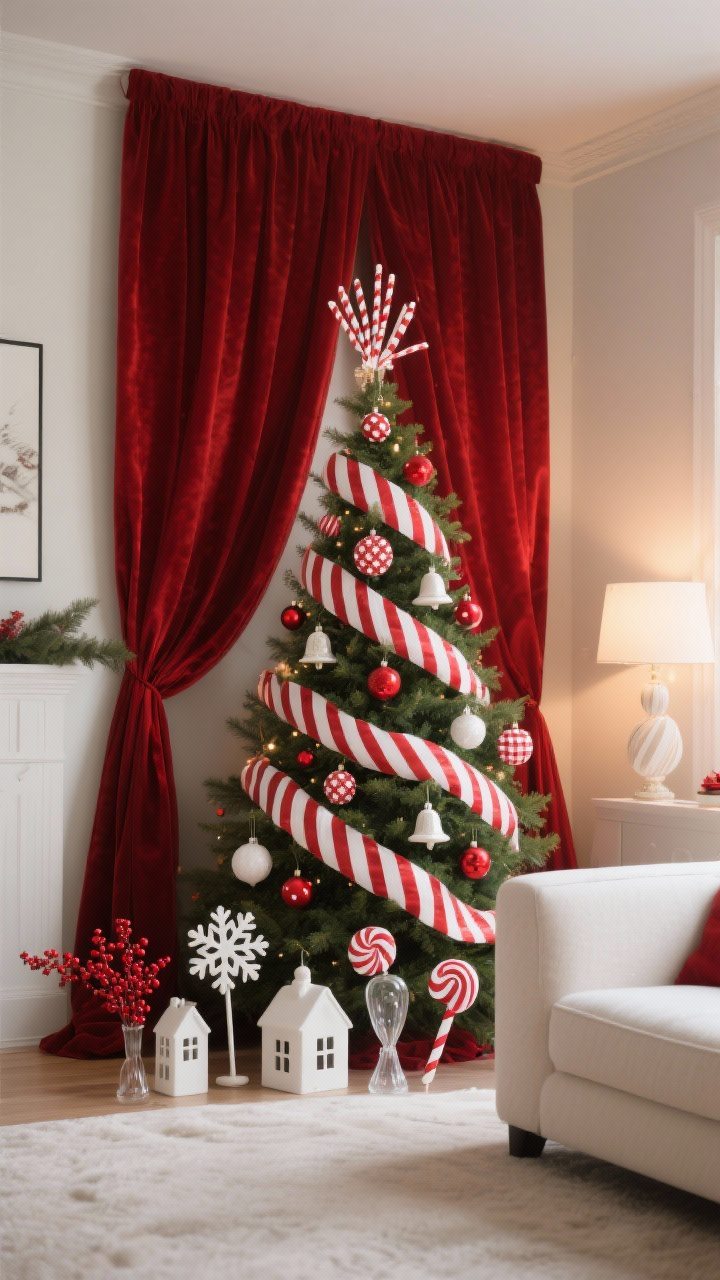
Red-and-white stripes are the holiday equivalent of a red lip—timeless but still fun. The trick is to give them an upscale twist so it feels curated, not kiddie.
Ways to Stripe Smarter
- Candy-cane picks: Add striped picks or sprays near the top and midsection for height and movement.
- Ribbon layering: Pair a wide red velvet ribbon with a narrower peppermint stripe layered over it. Angle slightly for a tailored drape.
- Pattern play: Introduce one more pattern—gingham or polka dots—in tiny doses to keep it playful without chaos.
What to Pair With Stripes
- White ceramic ornaments: Snowflakes, houses, or bells keep the look crisp.
- Glass candy and lollipops: A few “sweet” ornaments make it whimsical without turning into a theme park.
- Red berry stems: Tuck clusters toward the center for extra color punches.
Pro tip: Add a few clear glass ornaments to break up the red and reflect your lights—like tiny mirrors for that glow-up effect.
4. Rustic Red: Berries, Burlap, And a Little Nordic Charm
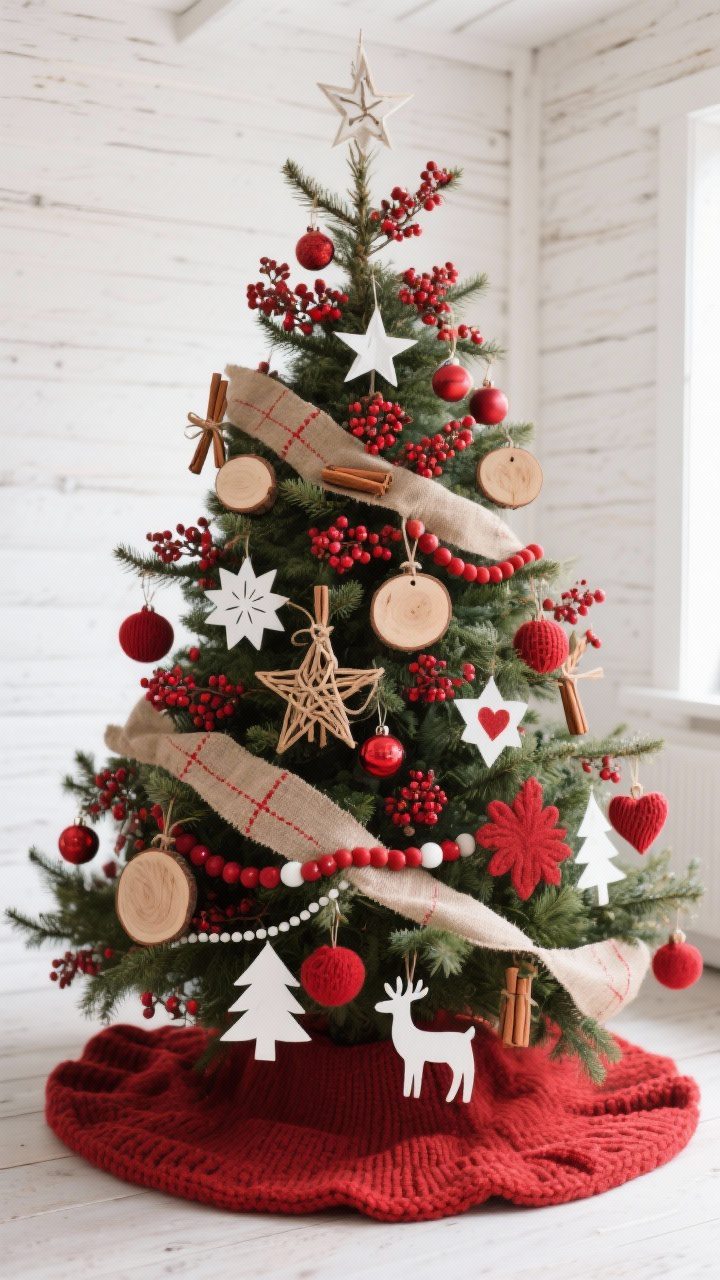
If you love a cozy, cabin vibe, go for a **rustic red** palette. Think red berries, wooden ornaments, knit textures, and loads of greenery. It’s simple, charming, and still totally chic.
Build the Look
- Red berry sprays: Tuck 12–20 stems evenly from top to bottom for color spots that feel organic.
- Natural textures: Add wood slices, cinnamon sticks, and woven stars. Mix in red felt or knit ornaments for warmth.
- Burlap or linen ribbon: Run a neutral ribbon with a subtle red stitch detail to tie it all together.
Nordic Details That Feel Elevated
- Paper stars: White or kraft paper stars balance the red beautifully.
- Scandi shapes: Hearts, trees, and reindeer in red and white keep it minimal but festive.
- String garland: A simple red-and-white wooden bead garland adds rhythm without visual noise.
IMO: A matte red tree collar or a chunky knit tree skirt in cranberry finishes this look like a pro. It grounds the tree and hides the stand—no shade to your stand, but it’s not the main character.
5. Statement Makers: Red Toppers, Florals, And Bold Finials
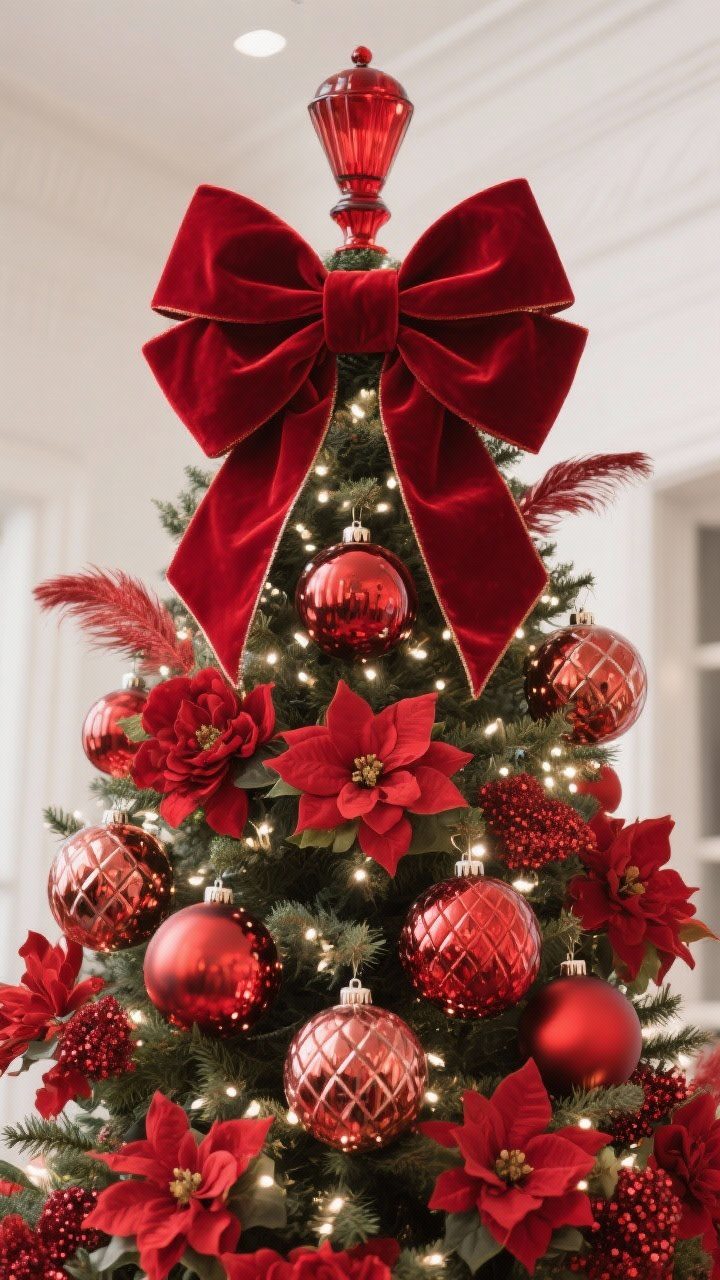
If you’re going to do red, go big somewhere. A showstopper topper, oversized florals, or dramatic finials can transform a nice tree into a “hold on, I need a photo” tree.
Top It Like You Mean It
- Red velvet bow topper: A structured, multi-loop bow with long tails draped into the tree feels luxe and traditional.
- Floral explosion: Cluster red poinsettias, peonies, or magnolias at the crown and cascade a few down the front.
- Spire/finial topper: A tall red glass finial elongates the tree and reads vintage glam.
Go Oversized (Strategically)
- Hero ornaments: Place 3–5 oversized red pieces—think quilted glass globes or mercury-glass finials—at eye level and slightly deeper in the branches.
- Feather or sequin accents: Tuck a few red feather picks or sequin sprays for movement and sparkle.
- Balance the weight: When you add big pieces, counterbalance with medium ornaments opposite them to avoid the dreaded tilt.
FYI: If your ceiling is under 8 feet, pick a topper that’s more horizontal (wide bow or floral spray) instead of tall. Save your drywall from the finial poke.
Placement Blueprint (Quick and Easy)
- Top third: Toppers, floral clusters, smaller shiny reds.
- Middle third: Your showstopper ornaments, velvet clusters, candy-cane stripes.
- Bottom third: Bigger matte ornaments, berry stems, and heavier finials for visual stability.
Lighting That Loves Red
- Warm white for cozy: Highlights burgundy and velvet beautifully.
- Soft twinkle mode: Flicker, not flash—let the red be dramatic, not the lights.
- Layered lighting: Wrap lights deep inside first, then a second layer on the outside. Your reds will glow from within.
Pulling It All Together
- Pick a main red: Burgundy, holly, or cranberry—choose one to dominate.
- Limit your supporting cast: One metallic + one neutral (white, ivory, or natural wood) keeps it cohesive.
- Repeat intentionally: Each “star element” should appear at least three times to look intentional, not random.
Bonus Styling Tip: Tie the theme to the rest of the room—red throw pillows, a wool blanket, or a bowl of cranberry potpourri. Small echoes make the tree feel integrated, not isolated.
Care And Storage (Because Future You Will Thank You)
- Separate finishes: Store glitter away from velvet and matte to avoid cross-contamination. Glitter gets everywhere—it’s basically immortal.
- Protect bows and florals: Stuff loops with tissue and store in shallow bins so they keep their shape.
- Label by zone: Top/middle/bottom baggies for ornaments make next year’s setup 10x faster.
Ready to go full-on festive? Pick your red mood—luxe velvet, glossy-meets-matte, peppermint chic, rustic cozy, or a statement topper—and build from there. Keep the palette tight, play with texture, and let the red do what it does best: steal the show. Your tree’s about to be the main character, and honestly, it deserves it.